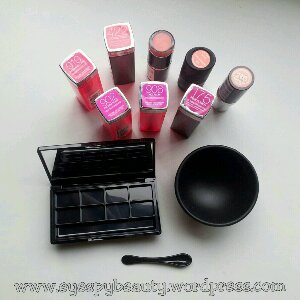
A few months back I bought a Japonesque lipstick palette kit.
The palette itself is very compact and perfect for slipping into your handbag. The downside to a small 8-well palette is deciding which lipsticks to depot (or de-bullet).
As part of my ongoing kit clearout, I’ve sorted all of my lipsticks by shade range, reds, pinks, corals, nudes, and purples.
I wear brights all year round and end up carrying 4 or 5 in my handbag by the end of the week, so this seemed like a good place to start. As it was my first time using the heat method of pressing lipstick I decided to start with my drugstore brights, so if I cocked it up, they’d be cheap to replace.
So, lipsticks selected. Now comes the fun part. The instructions are pretty basic and I added a few hygiene steps of my own.
What you’ll need
Palette, rubber melting pot, 8 lipsticks, metal spatula/ knife, Isopropyl Alcohol (IPA), cotton wool pads.
How to
1. Wash hands and give the mixing bowl, metal & plastic spatulas a wipe with IPA to disinfect them before use.
2. Decide on the order the lipsticks will go in the palette and lay them out in that order. Write it down so you can mark the palette.
3. Slice off a 1cm chunk of lipstick from the first bullet using the knife/ metal spatula and put it in the melting pot.
4. Place the melting pot in microwave and heat for 1-2 minutes until the lipstick is fully melted. Don’t let it boil.
5. Gently but quickly pour the liquid lipstick into the first well of the palette.
6. Wipe the melting pot and spatula out with IPA and a cotton wool pad.
7. Repeat steps 3 – 6 for the remaining lipsticks.
Lessons learned
* Some lipsticks melt faster than others. Melt them 30s at a time so they are fully melted but not boiling.
* Some lipsticks are denser than others. 1cm chunk of one lipstick will fill a well where 1.5 cm of another fills the same sized well.
* Melting gives a smooth finish in the palette but results in some wastage of lipstick.
* The lip palette kits are quite expensive for what they are. Essentially it’s a rubber bowl, and a plastic box with dividers. A budget alternative is to pick up some pill boxes for the palette; and melt the lipstick in the microwave on grease-proof paper.
This palette is perfect for my handbag, but for my kit, I’ll use the pill box option. I probably won’t bother melting the lipsticks in the pill boxes as I tend to lift a chunk onto a separate metal palette for use on clients, so don’t need it to be melted smooth. Now I’ve got the kit, I’ll use it again with other (cheaper) empty palettes but I don’t think you need a special kit like this really. It’s nice to have but not essential.
Here’s my finished palette!


